Ikanos — Installation
To use Ikanos, you need to install Ikanos and then run a capability YAML file either through the Docker image or directly with the CLI. The same runtime verb is used in both cases: serve.
Ikanos Engine
Prerequisites
- You need Docker or, if you are on macOS or Windows their Docker Desktop version. To do so, follow the official documentation:
- For Mac
- For Linux
-
Be sure that Docker (or Docker Desktop) is running
Pull Ikanos's Docker image
- Ikanos provides a docker image hosted in GitHub packages platform. It is public, so you can easily pull it locally.
Then, you should see the image 'ghcr.io/naftiko/ikanos' in your Docker Desktop.\
# {{RELEASE_TAG}}
docker pull ghcr.io/naftiko/ikanos:{{RELEASE_TAG}}

# Or if you prefer to play with the last snapshot
docker pull ghcr.io/naftiko/ikanos:latest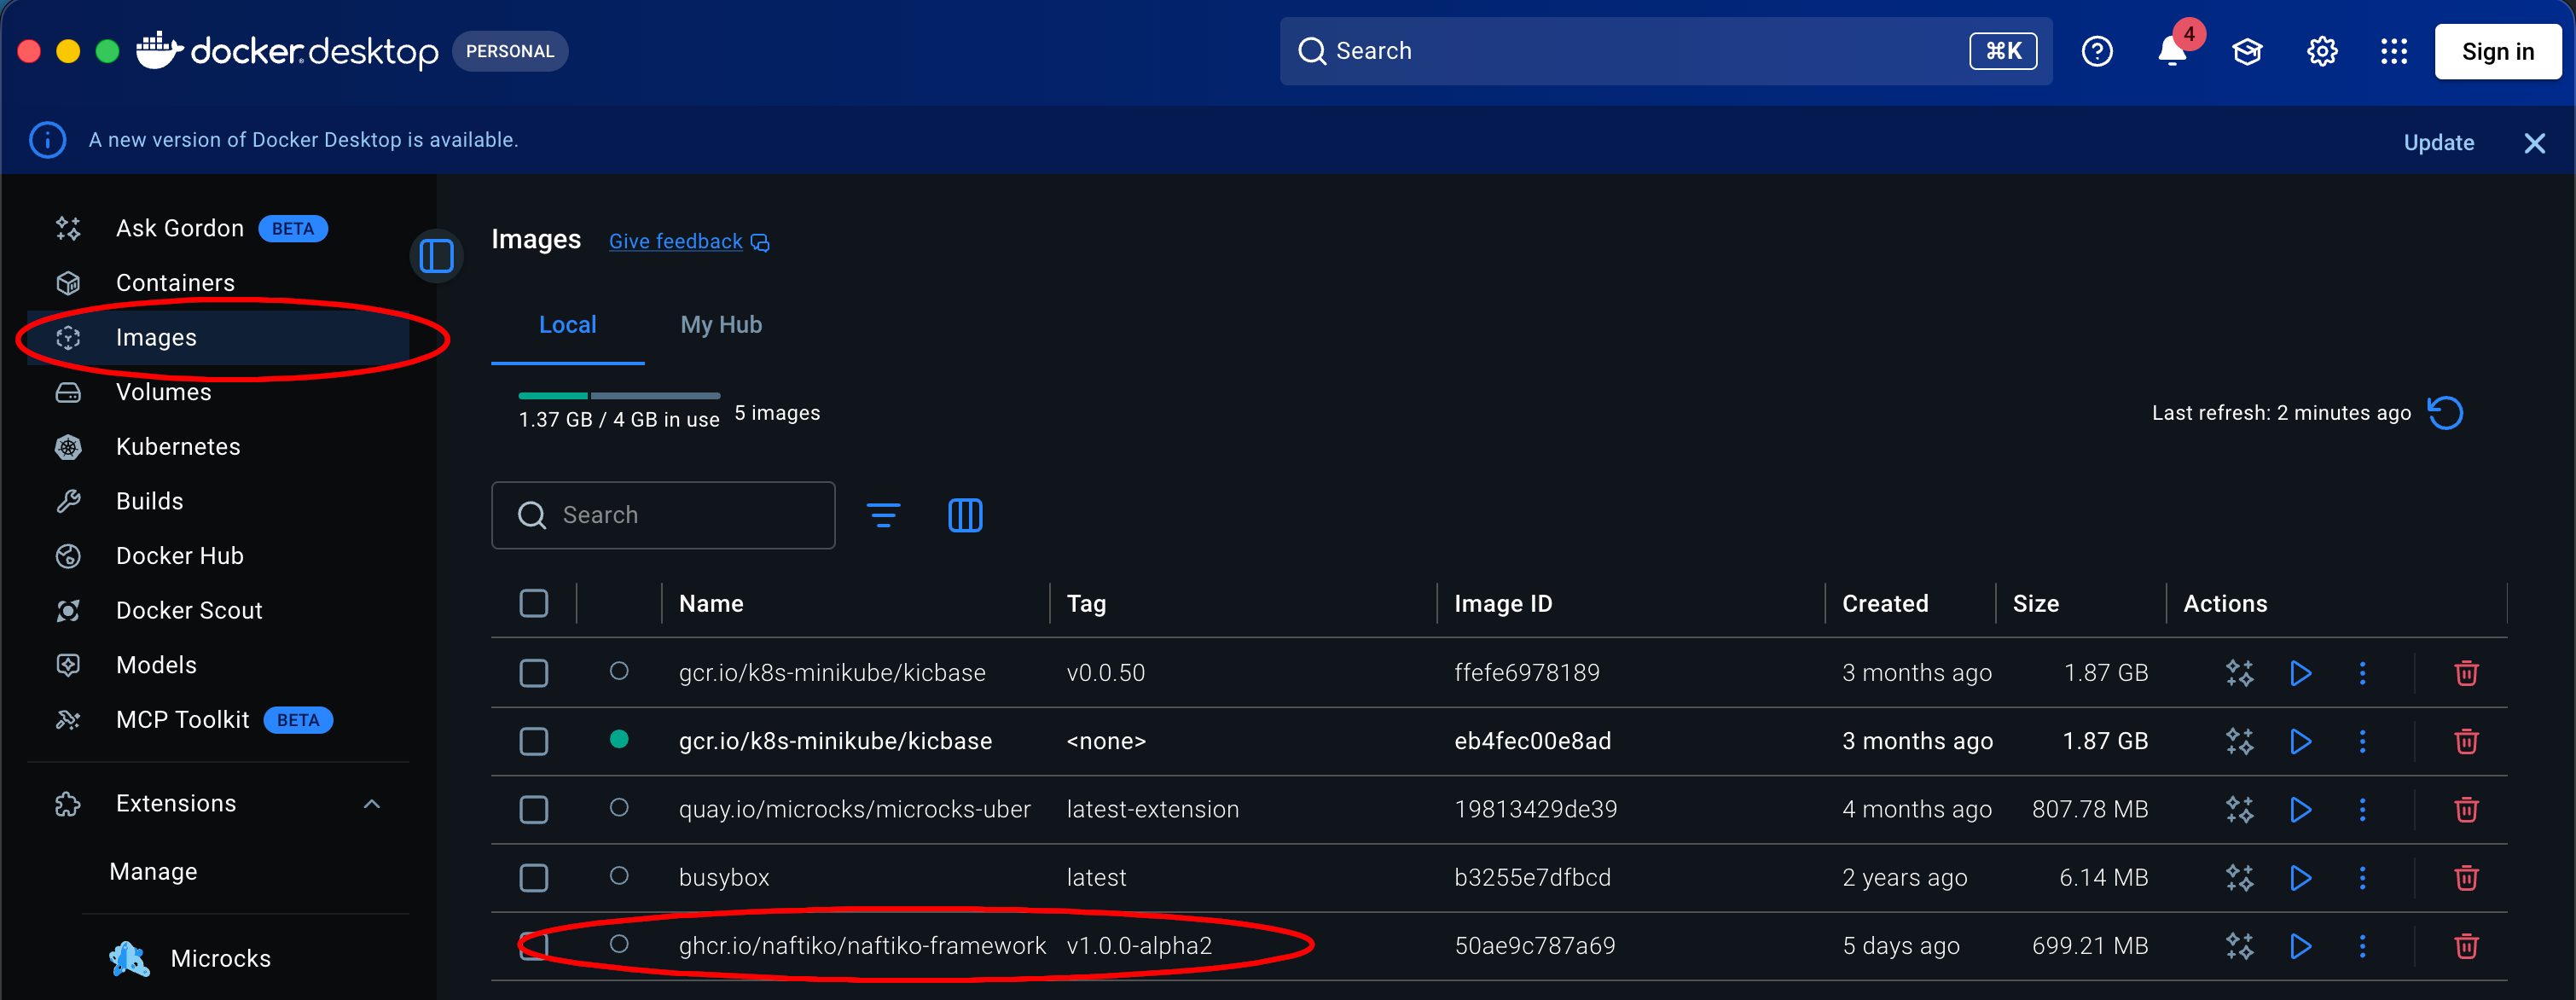
You can also display local images in your terminal with this command:
Configure your own capability
The Ikanos Engine runs capabilities. For that, it uses a capability configuration file. You first have to create this file locally.\
-
The simpler to start is to download the following capability file example on your local machine: step-1-shipyard-first-capability.yml.
-
Advanced usage\ You can use more complex capability files from Tutorial — Track 1: Context Engineering and Tutorial — Track 2: API Reusability, and then move to the comprehensive Specification - Schema and Specification - Rules. This file must be a YAML file (yaml and yml extensions are supported).
-
⚠️ Localhost references in your capability configuration file.
- If your capability refers to some local hosts, be careful to not use 'localhost', but 'host.docker.internal' instead. This is because your capability will run into an isolated docker container, so 'localhost' will refer to the container and not your local machine.\ For example:
- In the same way, if your capability expose a local host, be careful to not use 'localhost', but '0.0.0.0' instead. Else requests to localhost coming from outside of the container won't succeed.\ For example:
Run Ikanos Engine as a Docker container
Let's assume you downloaded step-1-shipyard-first-capability.yml in your downloads folder. Then you should run:
# For Linux and Mac
docker run -p 8081:3001 -v ~/Downloads/step-1-shipyard-first-capability.yml:/app/test.capability.yaml ghcr.io/naftiko/ikanos:{{RELEASE_TAG}} serve /app/test.capability.yaml

# For windows
docker run -p 8081:3001 -v %USERPROFILE%/Downloads/step-1-shipyard-first-capability.yml:/app/test.capability.yaml ghcr.io/naftiko/ikanos:{{RELEASE_TAG}} serve /app/test.capability.yaml
The Docker image now defaults to ikanos serve. If you mount your capability file at /app/ikanos.yaml, you can omit the explicit command entirely:
docker run -p 8081:3001 -v ~/Downloads/step-1-shipyard-first-capability.yml:/app/ikanos.yaml ghcr.io/naftiko/ikanos:{{RELEASE_TAG}}
Options detail
-
Use of a Docker volume.\ As you have to provide your local capability configuration file to the docker container, you must use a volume. This is done using the '-v' option of the docker run command.
-
Use of port forwarding.\ According to your configuration file, your capability will be exposed on a given port (
portfield of theexposeitem). Keep in mind that the framework engine runs in a container context, so this port won't be accessible from your local machine. You must use the port forwarding. This will be done using the '-p' option of the docker run command. -
Run your capability with Ikanos Engine.\ Given a capability configuration file 'test.capability.yaml' and an exposition on port 8081, here is the command you have to execute to run the Framework Engine:
Ikanos CLI
The Ikanos also includes a CLI tool.\
The goal of this CLI is to simplify configuration, validation, and local execution without Docker. While everything can be done manually, the CLI provides helper commands and now starts capabilities directly with ikanos serve.
Installation
macOS
For the moment, CLI is only provided for Apple Silicon (with M chip). Apple Silicon (M1/M2/M3/M4):
# Download the binary
curl -L https://github.com/naftiko/ikanos/releases/download/{{RELEASE_TAG}}/ikanos-cli-macos-arm64 -o ikanos

# Set binary as executable
chmod +x ikanos

# Delete the macOS quarantine (temporary step, because the binary is not signed yet)
xattr -d com.apple.quarantine ikanos

# Install
sudo mv ikanos /usr/local/bin/
Linux
# Download the binary
curl -L https://github.com/naftiko/ikanos/releases/download/{{RELEASE_TAG}}/ikanos-cli-linux-amd64 -o ikanos

# Set binary as executable
chmod +x ikanos

# Install
sudo mv ikanos /usr/local/bin/
Windows
PowerShell installation is recommended.
Open PowerShell as admin and execute:
# Create installation folder
New-Item -ItemType Directory -Force -Path "C:\Program Files\Ikanos"

# Download the binary
Invoke-WebRequest -Uri "https://github.com/naftiko/ikanos/releases/download/{{RELEASE_TAG}}/ikanos-cli-windows-amd64.exe" -OutFile "C:\Program Files\Ikanos\ikanos.exe"

# Add to the system PATH
$oldPath = [Environment]::GetEnvironmentVariable('Path', 'Machine')
$newPath = $oldPath + ';C:\Program Files\Ikanos'
[Environment]::SetEnvironmentVariable('Path', $newPath, 'Machine')
Test
After installation, you may have to restart your terminal. Then run this command to check the CLI is well installed:
You should see the help of the command.Use
The CLI supports several features, including running a capability locally, creating a "minimum" valid capability configuration file, and validating a capability file.
Run a capability locally
ikanos serve path_to_your_capability_file
# If the file is named ikanos.yaml in the current directory:
ikanos serve
Ctrl-C.
Create a capability configuration file
The terminal will then ask you several questions. Finally, the file will be generated in your current directory.Validate a capability configuration file
The capabilities configuration file generated by the previous command should be valid. However, you can then complete it or even create it from scratch.\ The validation command allows you to check your file.
ikanos validate path_to_your_capability_file
# You can also use aliases like:
ikanos val path_to_your_capability_file
ikanos v path_to_your_capability_file
# Validate the capability configuration file with the schema v0.5
ikanos validate path_to_your_capability_file 0.5
💡 Tip: The Docker image and the CLI now use the same runtime verb.
docker run ... ghcr.io/naftiko/ikanos serve your-file.yamlandikanos serve your-file.yamlboth start a capability with the same command contract.💡 Tip: For inline validation as you type, install Crafter — the Naftiko VS Code extension, free in the Community edition. It validates both JSON Schema structure and Spectral rules directly in your editor.
Import an OpenAPI specification
Bootstrap a Ikanos consumes adapter from an existing OpenAPI 3.0 or 3.1 document:
ikanos import openapi path_to_openapi_file
# You can also use aliases like:
ikanos im oas path_to_openapi_file
ikanos i oas path_to_openapi_file
./<namespace>-consumes.yml. Use -o to choose a different output path:
The importer maps OAS authentication schemes (bearer, basic, API key, digest) to Ikanos authentication blocks, derives a namespace from the API title, and converts operations into consumes resources.
Export a REST adapter as an OpenAPI specification
Generate an OpenAPI document from an existing Ikanos capability's REST adapter:
ikanos export openapi path_to_capability_file
# You can also use aliases like:
ikanos ex oas path_to_capability_file
ikanos e oas path_to_capability_file
./openapi.yaml in OAS 3.0 format. Use --spec-version to produce OAS 3.1, -o for a custom output path, and -f for JSON output:
# Export as OAS 3.1 YAML
ikanos export openapi capability.yaml --spec-version 3.1

# Export as OAS 3.0 JSON
ikanos export openapi capability.yaml -f json -o api-spec.json
--adapter (or -a) to select a specific namespace:
When --adapter is omitted, the first REST adapter found is exported.
Manage scripting governance
Query and update the scripting governance configuration on a running capability's Control Port:
# Display current scripting config and execution stats
ikanos scripting

# Update a scripting setting at runtime
ikanos scripting --set timeout=60000

# Disable scripting
ikanos scripting --set enabled=false

# Restrict allowed languages
ikanos scripting --set allowedLanguages=javascript,python
Note: Requires a running Control Port with
management.scriptingconfigured in the capability. The CLI connects to the control port address and port defined in the capability.