Getting Started
To get started, you can install it in two ways: * For demo purpose with the provided Docker image, * For actual usage by integrating it into your existing Backstage portal.
A. Installation of Docker image
Prerequisites
- An up-to-date Docker Desktop running
- A GitHub Token with
repopermission → https://github.com/settings/tokens
1. Create a docker-compose.yml file
Copy the content below into a new file named docker-compose.yml on your machine:
services:
backstage:
image: ghcr.io/naftiko/backstage:latest
ports:
- "7007:7007"
environment:
POSTGRES_HOST: postgres
POSTGRES_PORT: 5432
POSTGRES_USER: backstage
POSTGRES_PASSWORD: backstage
GITHUB_TOKEN: your_token_here # <-- replace with your GitHub token
depends_on:
- postgres
postgres:
image: postgres:16
environment:
POSTGRES_USER: backstage
POSTGRES_PASSWORD: backstage
POSTGRES_DB: backstage
volumes:
- postgres_data:/var/lib/postgresql/data
volumes:
postgres_data:
💡 Make sure your GitHub Token has the
repopermission.
2. Launch Backstage
Open your browser at http://localhost:7007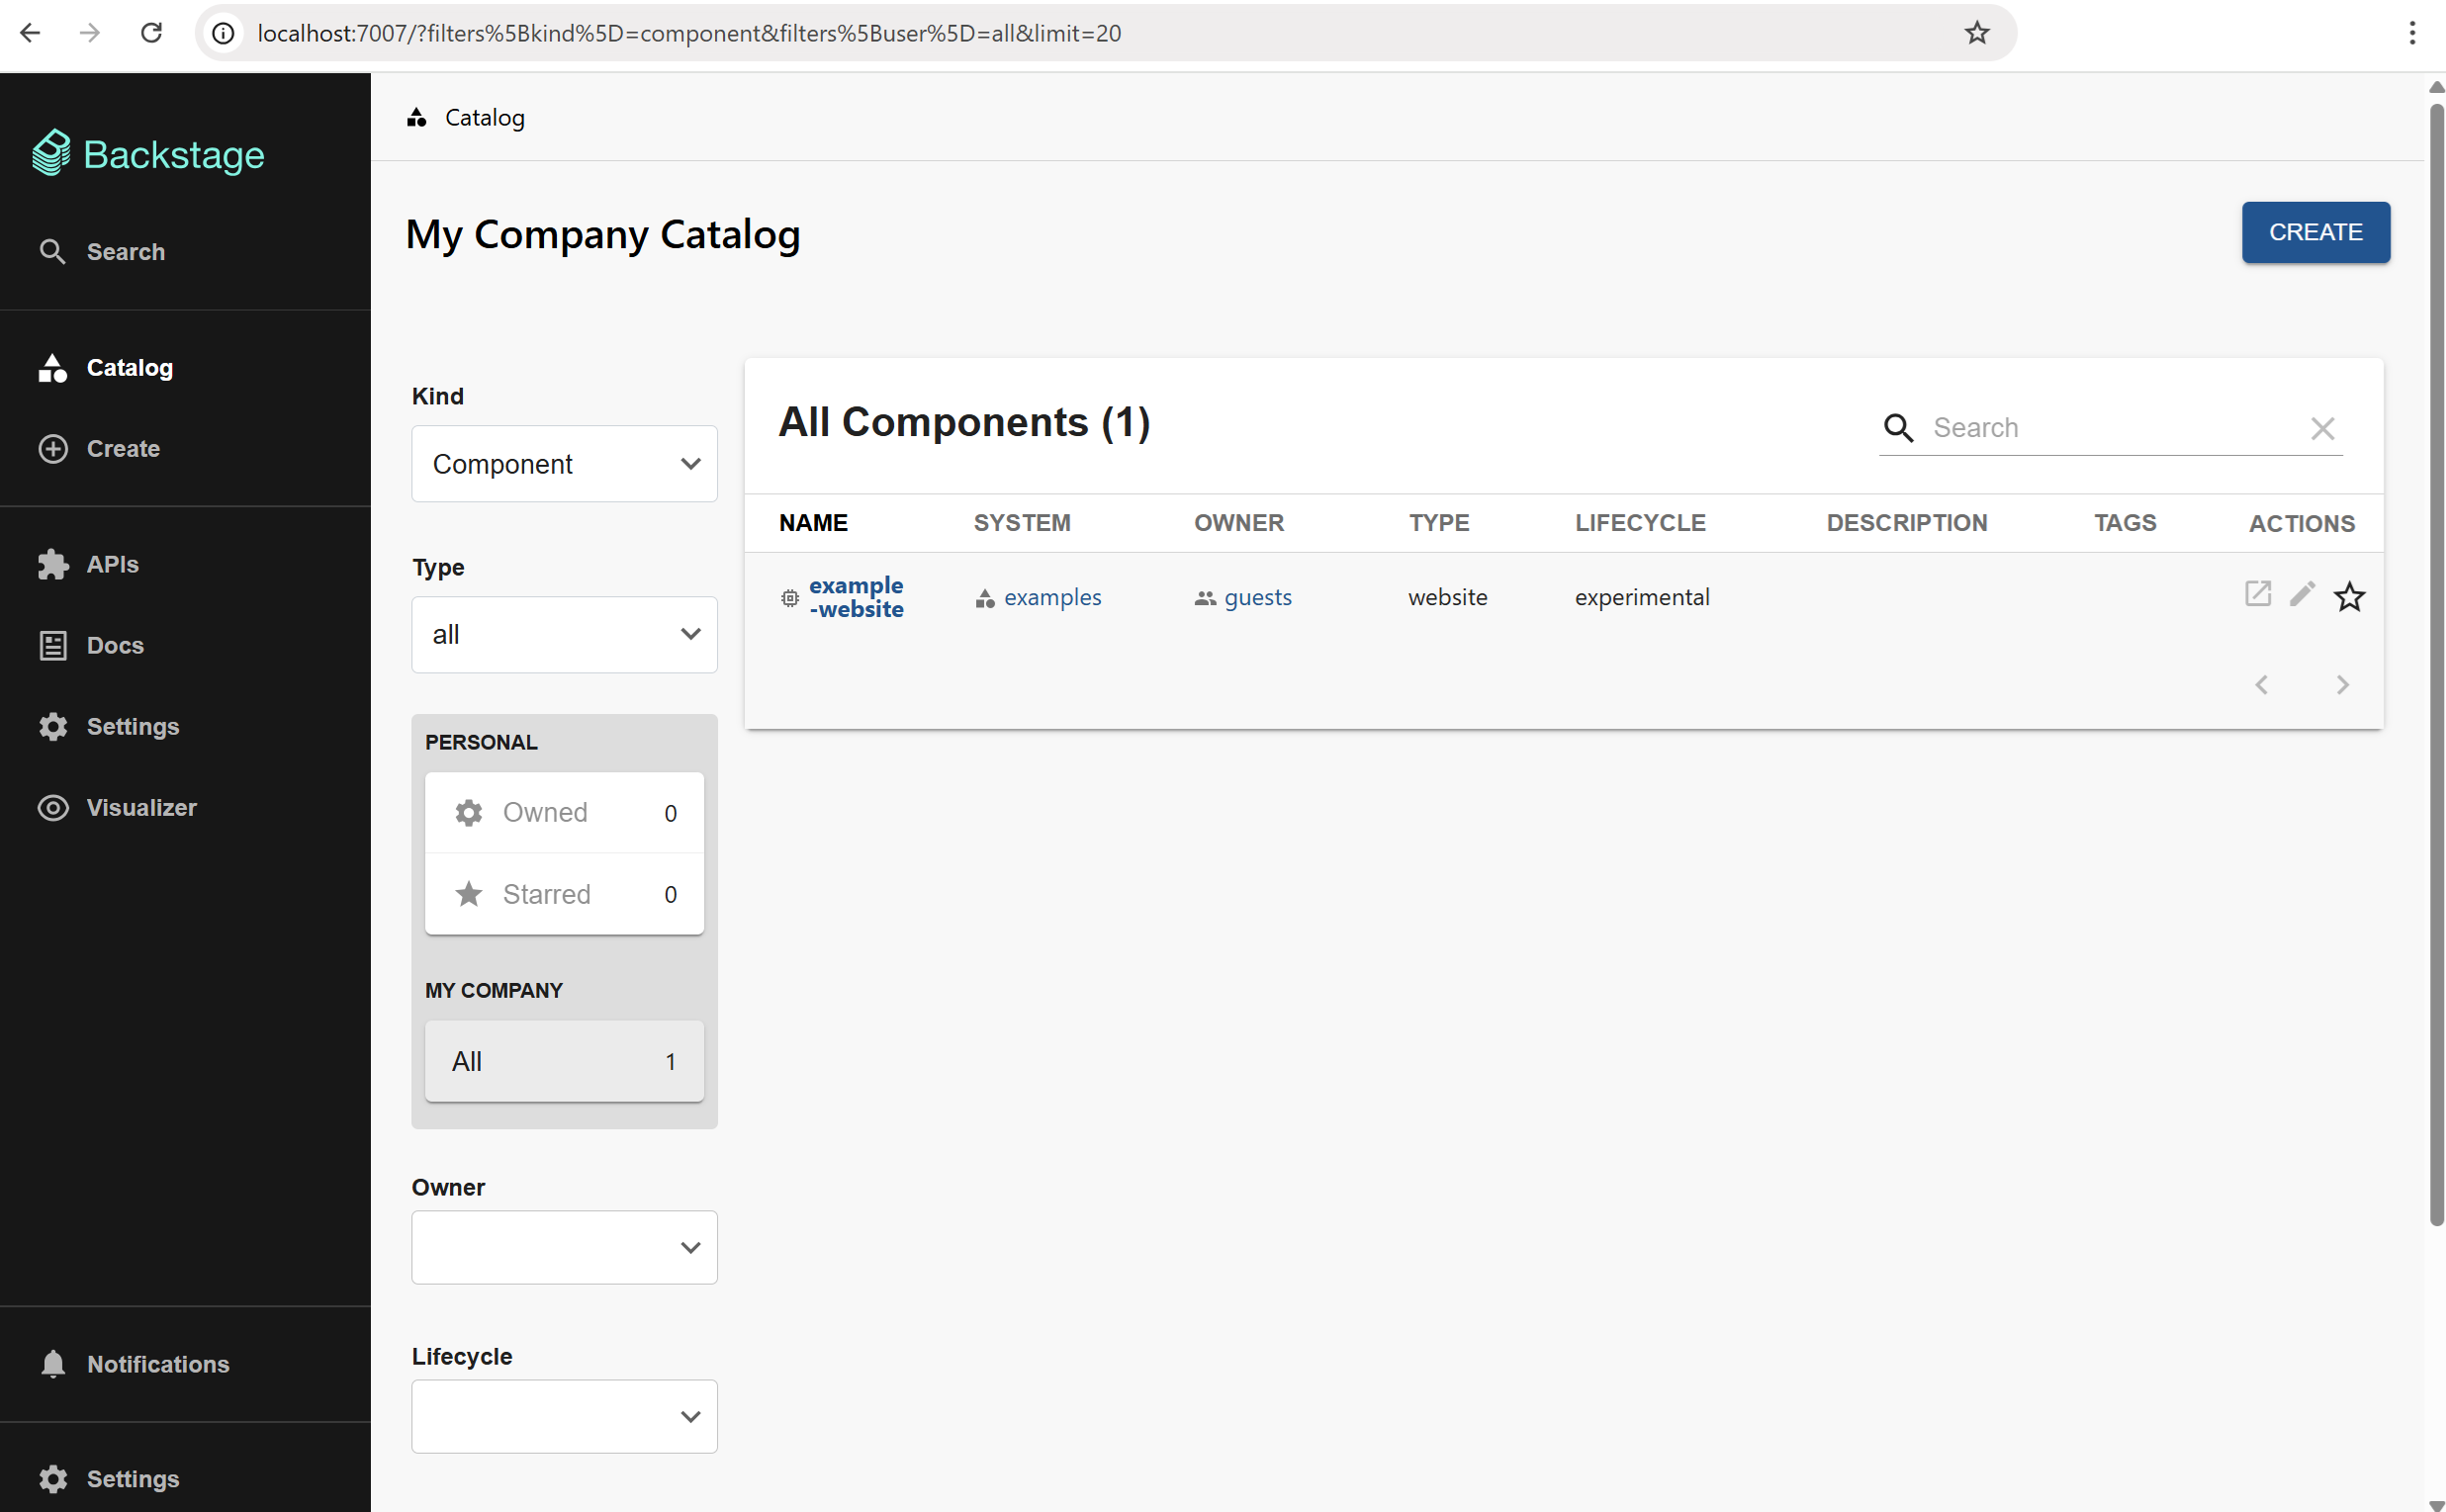
B. Installation in your own Backstage portal
This part explains how to integrate the Naftiko Warden custom template into an existing Backstage application.
1. Prerequisites
-
The template uses a custom scaffolder action that relies on the Ikanos CLI. It must be installed on the machine running your Backstage backend.
Follow the installation instructions for your platform: Ikanos CLI Installation
Verify the installation by running:
-
The template generates a backstage service component corresponding to a capability. These component displays TechDocs and Kubertnetes informations. That's why the TechDocs and Kubernetes backstage plugins need to be installed
2. Install the custom scaffolder module
The template depends on a custom scaffolder backend module published to GitHub Packages.
Configure the GitHub Packages registry
Add the following to the .yarnrc.yml file at the root of your Backstage application:
Set the GITHUB_TOKEN environment variable to a GitHub personal access token with read:packages scope. This is required because GitHub Packages does not support anonymous access, even for public packages.
Install the package
Be sure to be at the root of your backstage application.
Register the module
In your Backstage backend entry point (typically packages/backend/src/index.ts), add:
Import the template configuration file in your Backstage catalog
The template definition is hosted in the public repository naftiko/fleet.
Add the following to your app-config.yaml under catalog.locations:
catalog:
  locations:
    - type: url
      target: https://github.com/naftiko/fleet/blob/main/warden/templates/capability.yml
      rules:
        - allow: [Template]
catalog:
  locations:
    - type: url
      target: https://github.com/naftiko/fleet/blob/main/warden/templates/capability.yml
      rules:
        - allow: [Template]
3. Configure GitHub integration
If not yet done, in your app-config.yaml :
integrations:
  github:
    - host: github.com
      token: ${GITHUB_TOKEN}

scaffolder:
  defaultAuthor:
    name: Backstage Scaffolder
    email: scaffolder@example.com
  defaultCommitMessage: "feat: initial scaffold from Backstage"
⚠️ Be sure to have a GitHub Private Access Token set as env variable GITHUB_TOKEN. Depending on its type, this PAT must have the following rights: * Classic PAT: repo + workflow * Fine-grained PAT: Administration (Read & Write) + Contents (Read & Write) + Workflows (Read & Write) + Metadata (Read)
4. Backstage component persistence
If you didn't modify it, by default the Backstage application is configure with an in-memory database
In app-config.yaml :
In this case, after adding a component with the Naftiko custom Backstage template, when re-starting the backstage application, the component won't be in the catalog anymore.
If you want to persist it, modify the configuration in your app-config.yaml, or app-config.local.yaml (for local tests only)
This will create a packages/backend/db-data folder where data will be persisted between application restarts. Don't forget to add it to your .gitignore file.
5. (re)Launch your Backstage application
Using the Naftiko custom template
1. Create a new Naftiko Capability
- Once you are on the Backstage application, go to the "Create" menu (at the bottom of the left-hand menu). You should see two templates: the Backstage example template for Node.js, and the Naftiko Warden template.
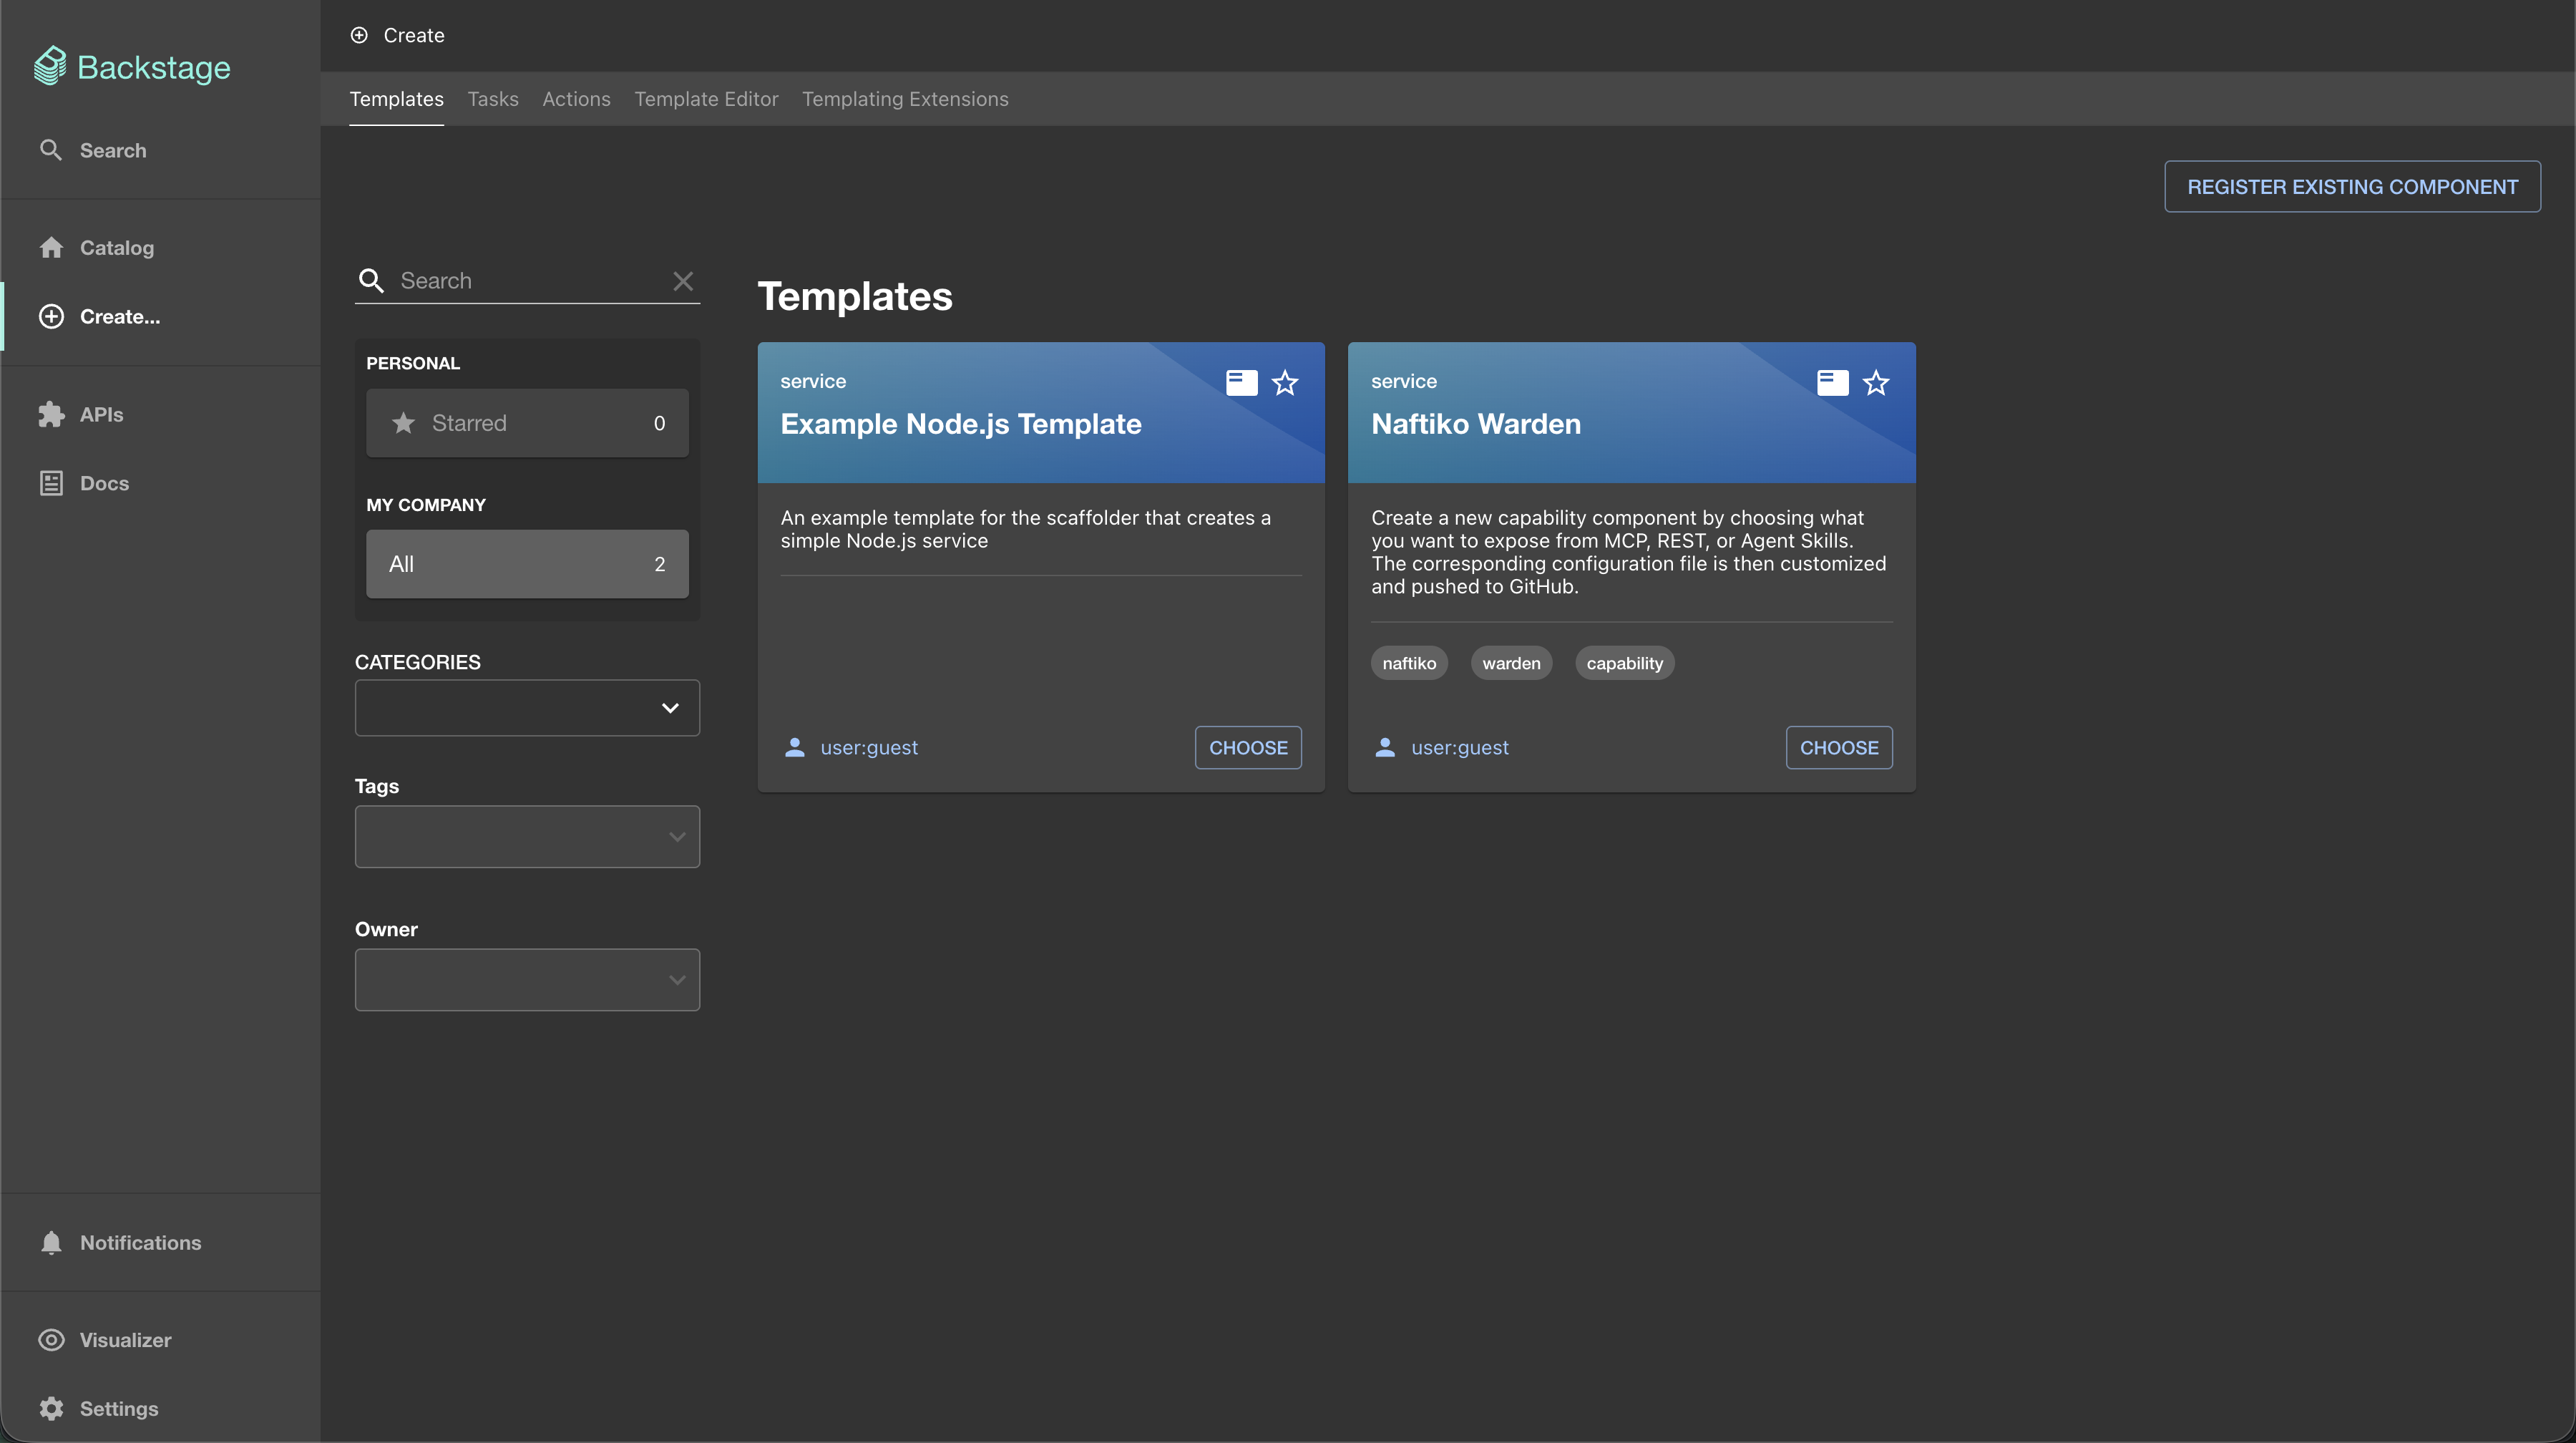
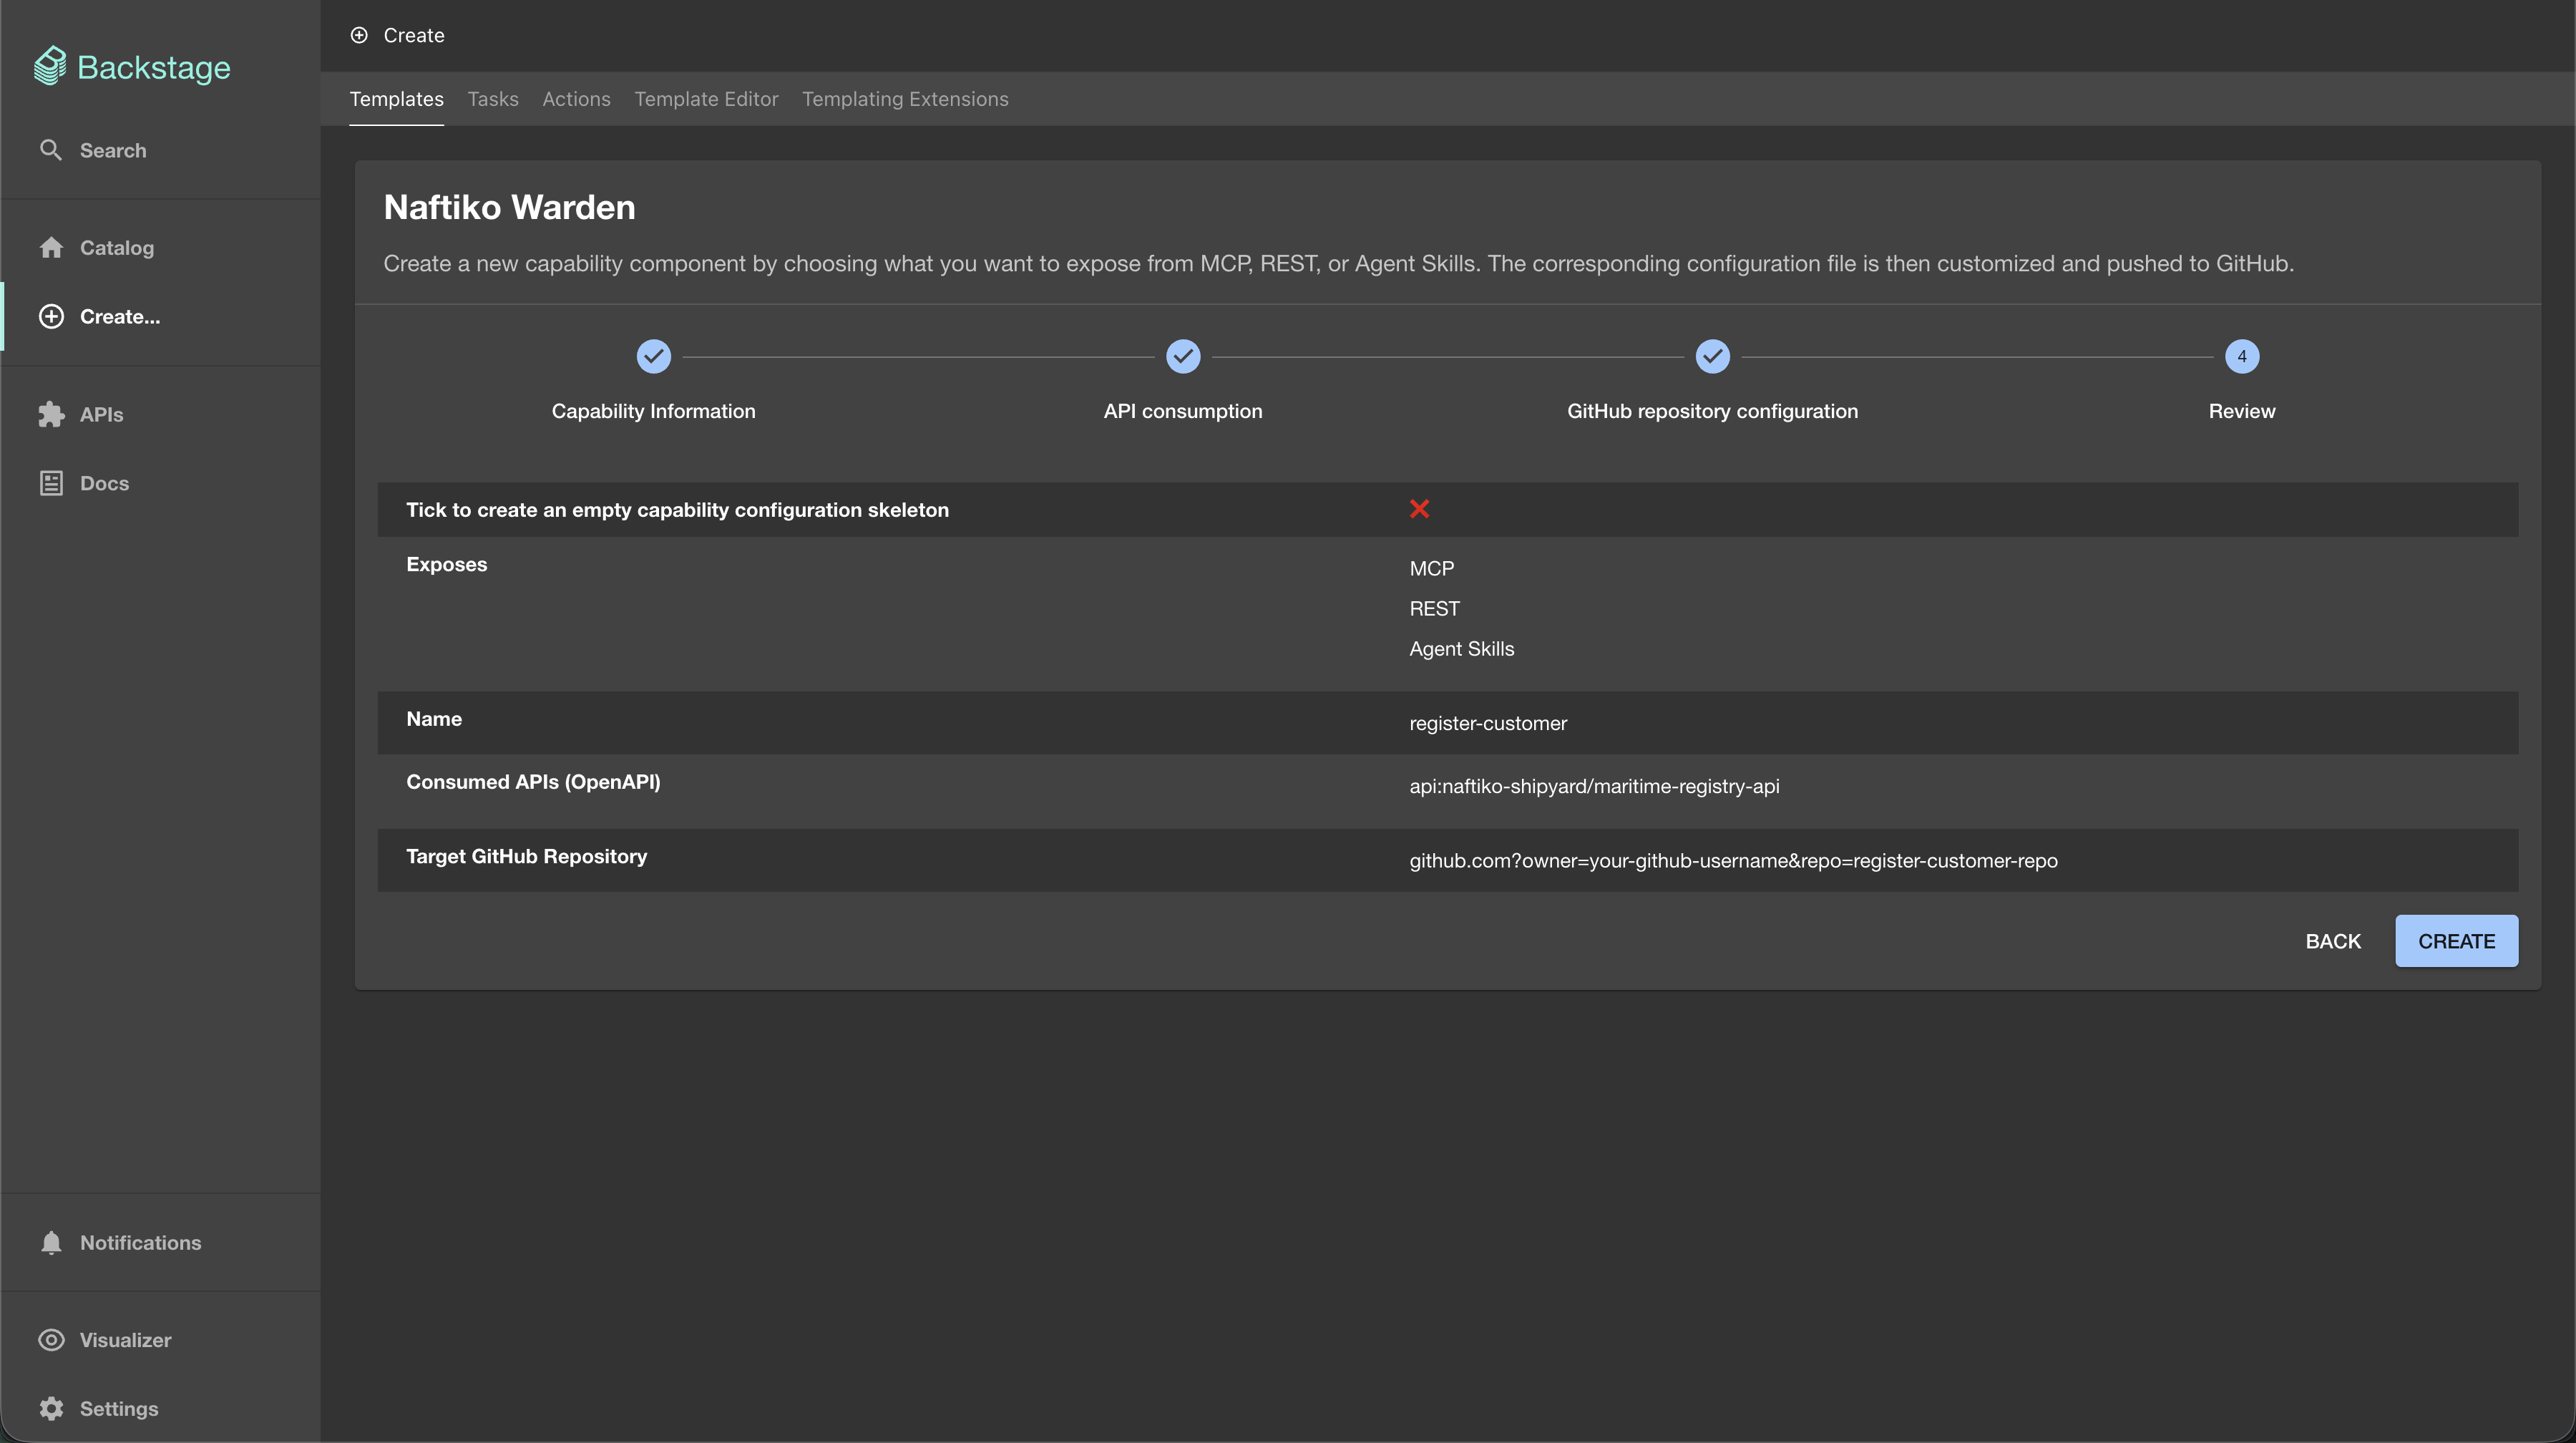
- Click on 'Choose' button of the Naftiko Warden template. A form will appear and ask you to enter several pieces of information.
- The name of your capability. Choose a business name (for example, register-customer).
- Do you want to create an empty component or choose which adapter types will be exposed? If you select empty, the developer will have to configure it manually. Otherwise, the various adapters will be pre-populated.
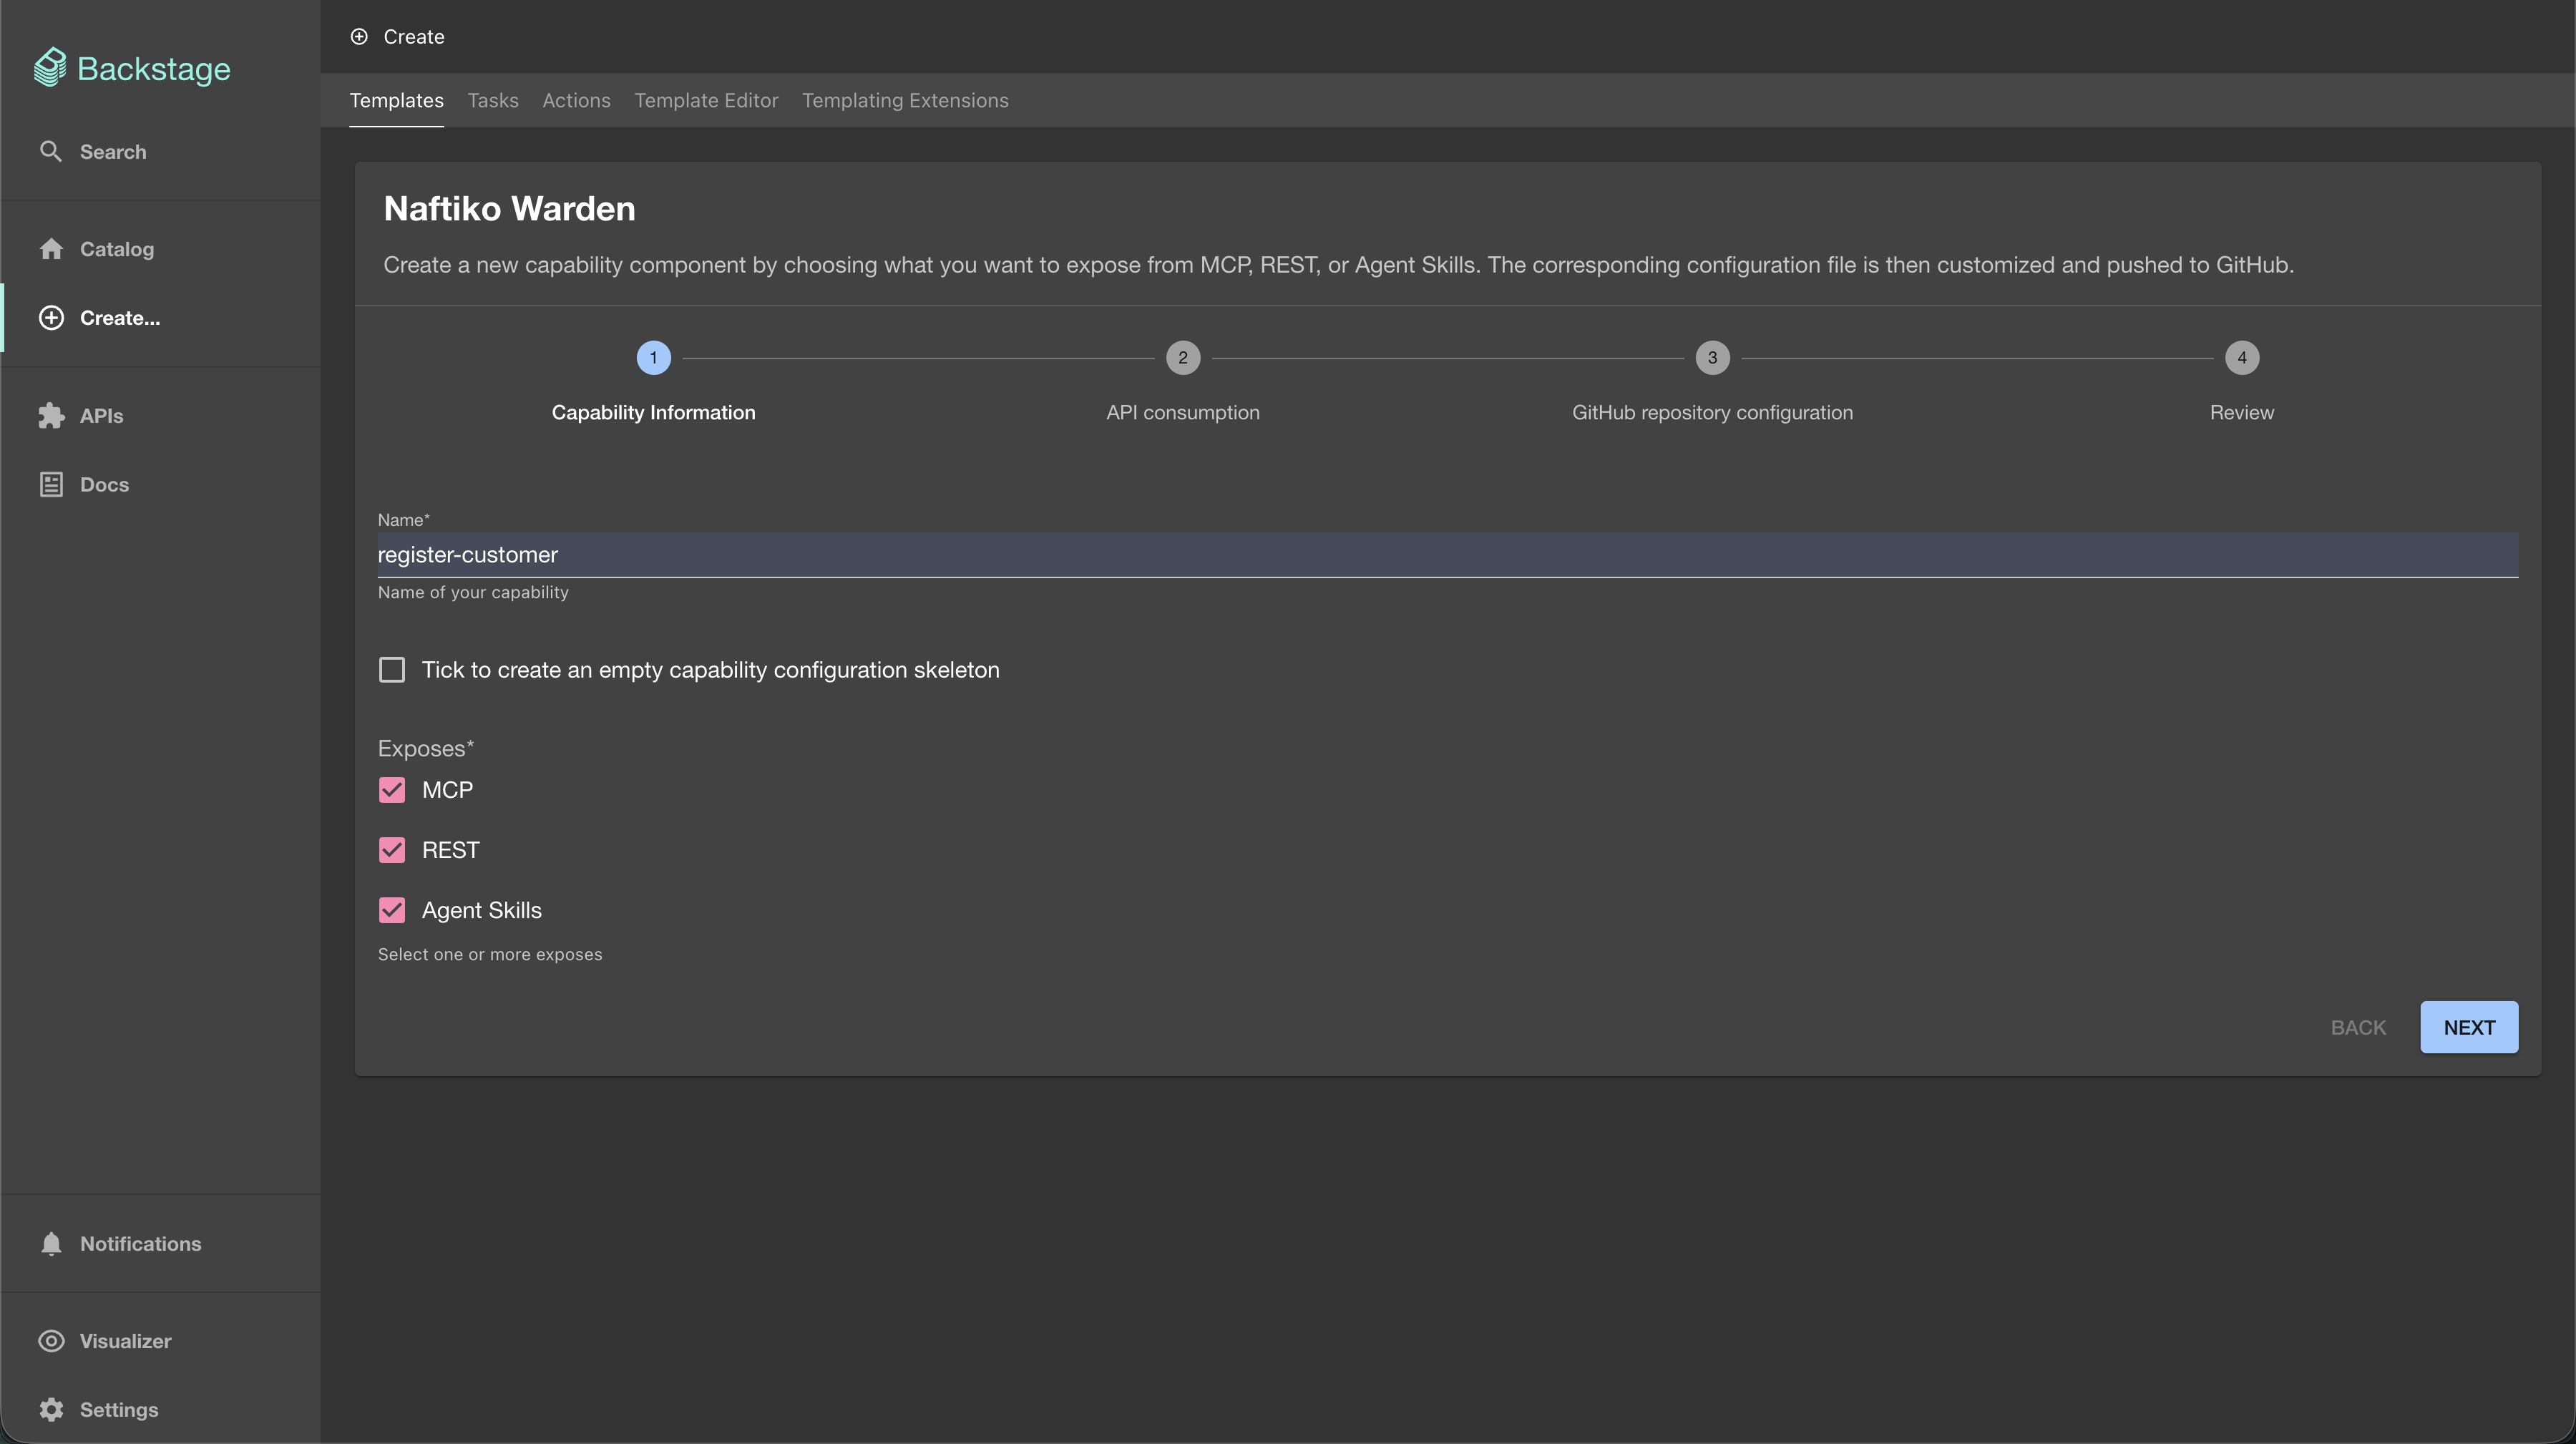
- Then click on 'Next' button. The second form allows you to select APIs from the backstage catalog. Note that only APIs with an OpenAPI description are available. For each selected API, a consumption configuration file will be pre-populated for your capability. If you do not select any APIs, you will need to configure this part manually.

- Click on 'Next' button. The third form is about your source code tool (only GitHub for the demo)
- Type your GitHub username
- Type the name of the repo you want to create to host your service component (for example, register-customer-repo).
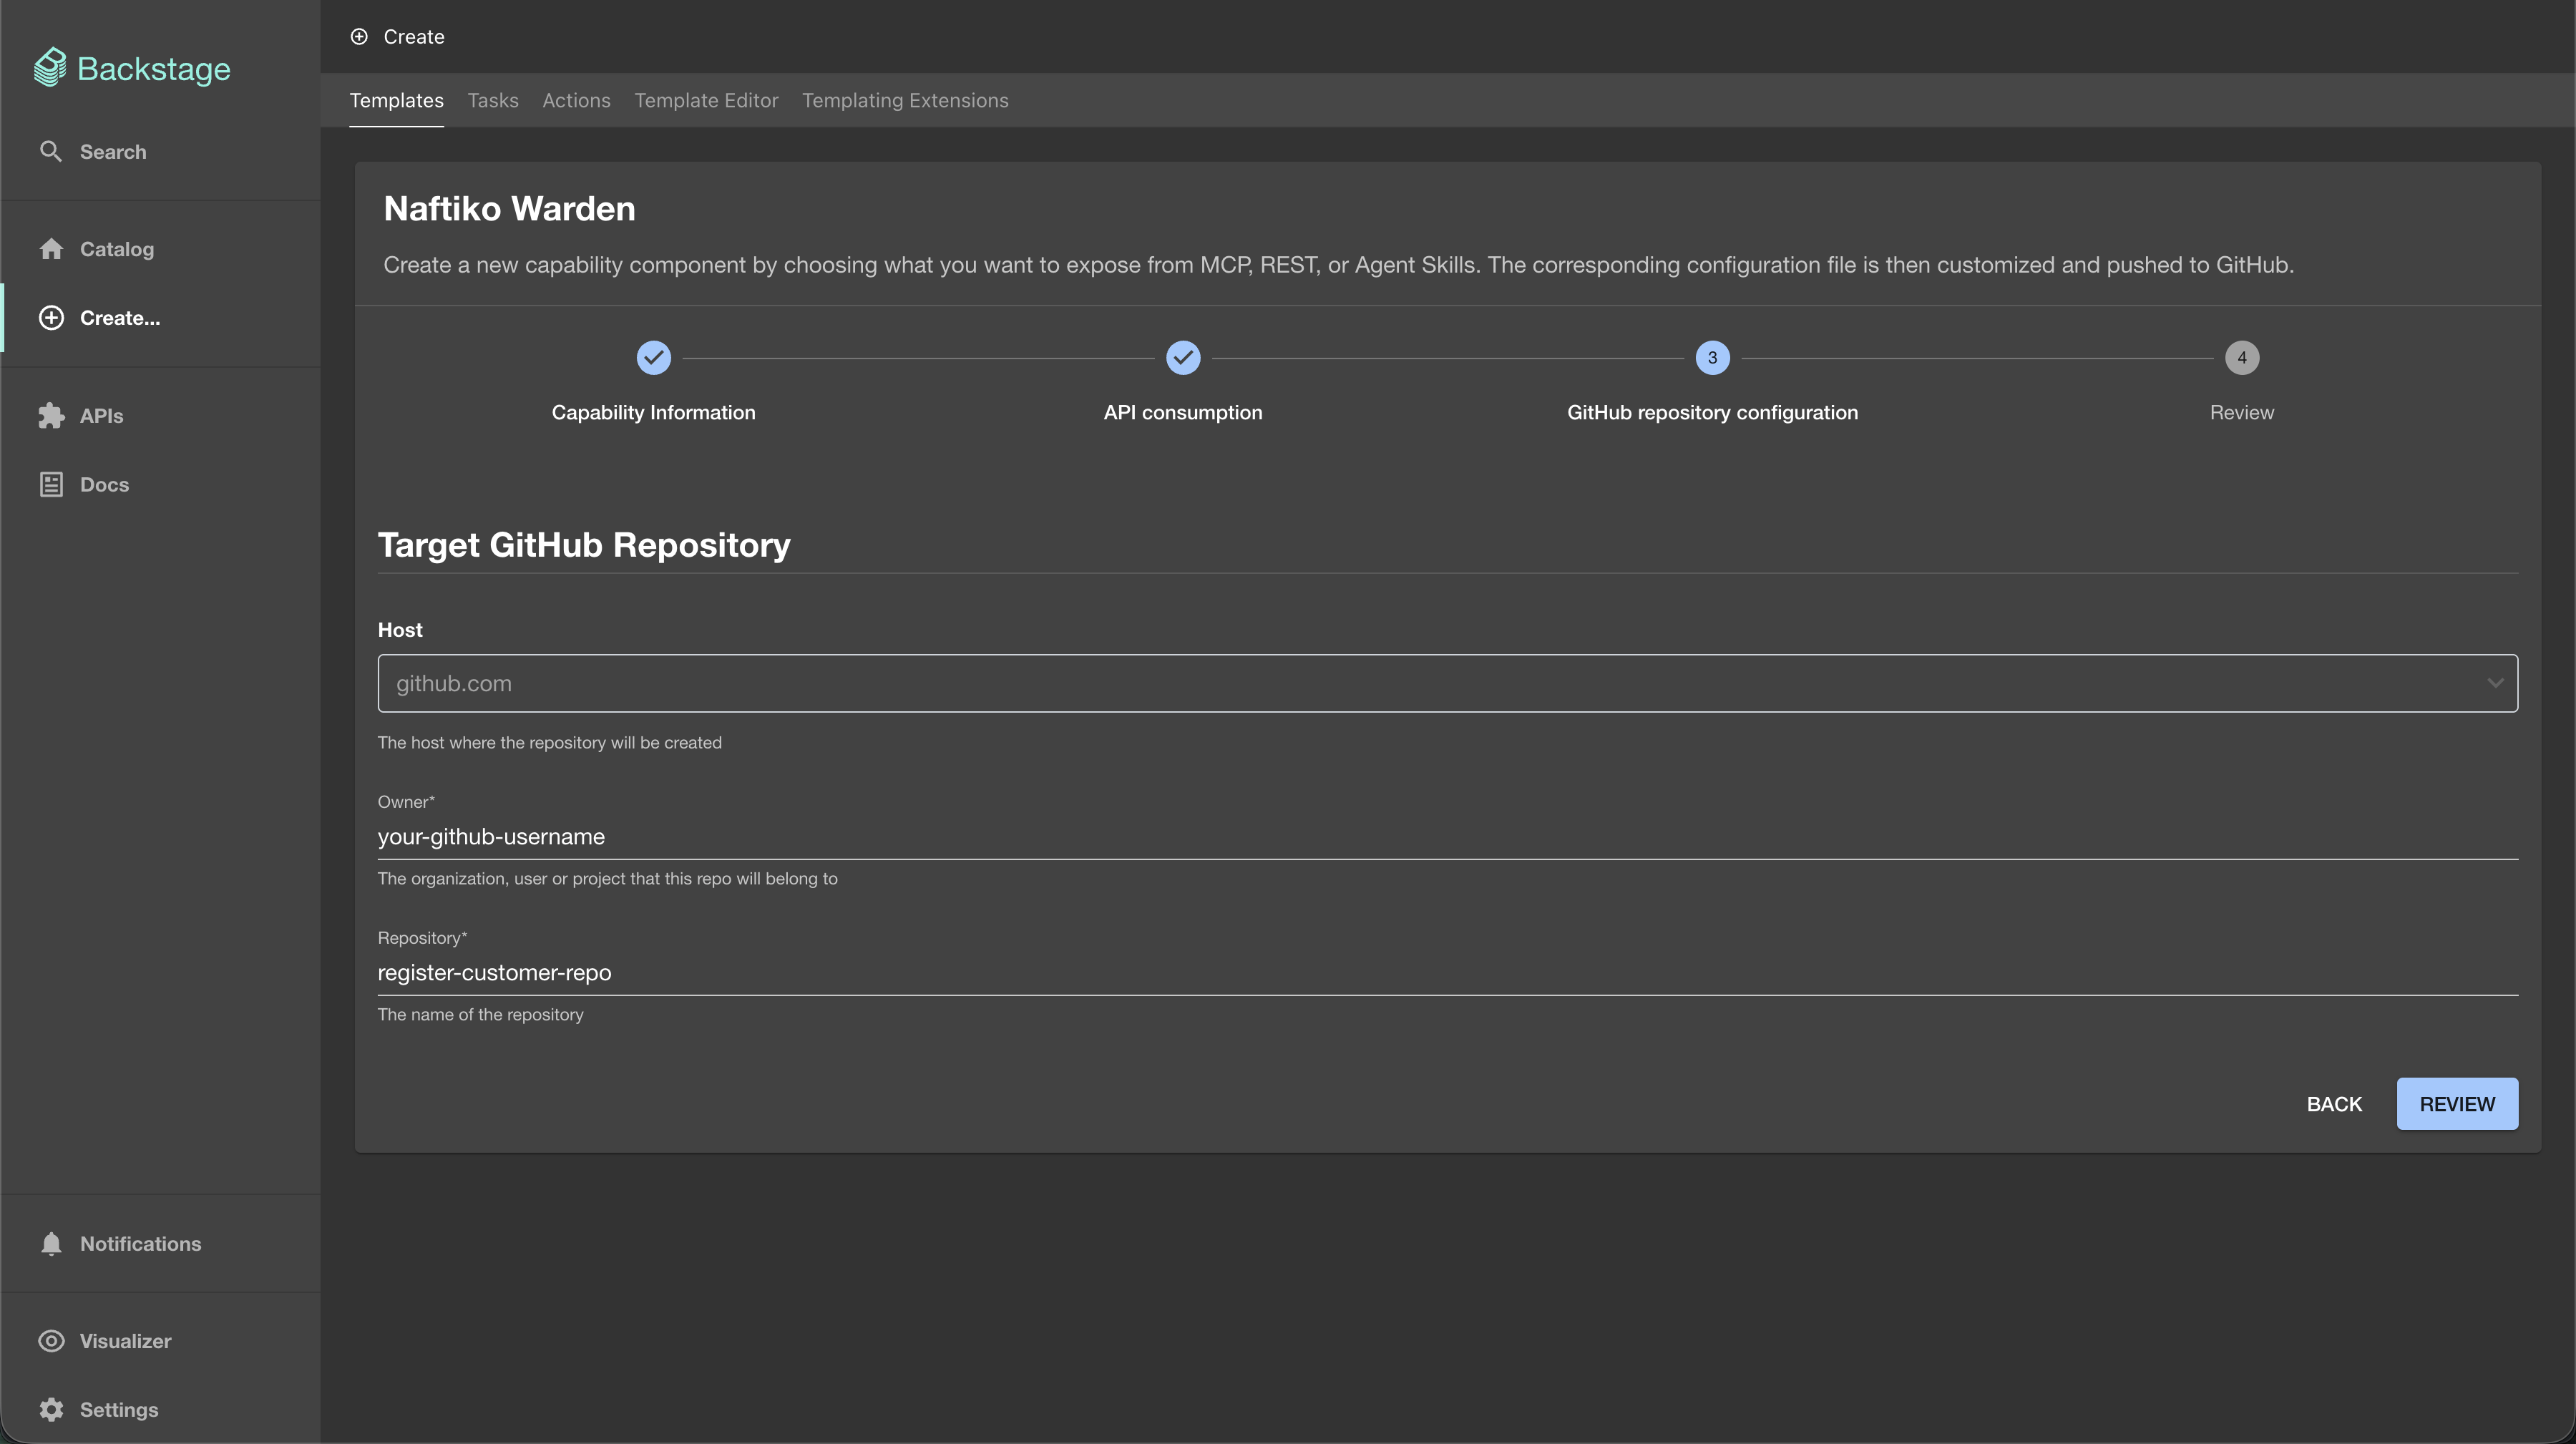
- At last click on 'Review' button. A summary of the entered parameters will be displayed. You can then finalize by clicking on the 'Create' button.
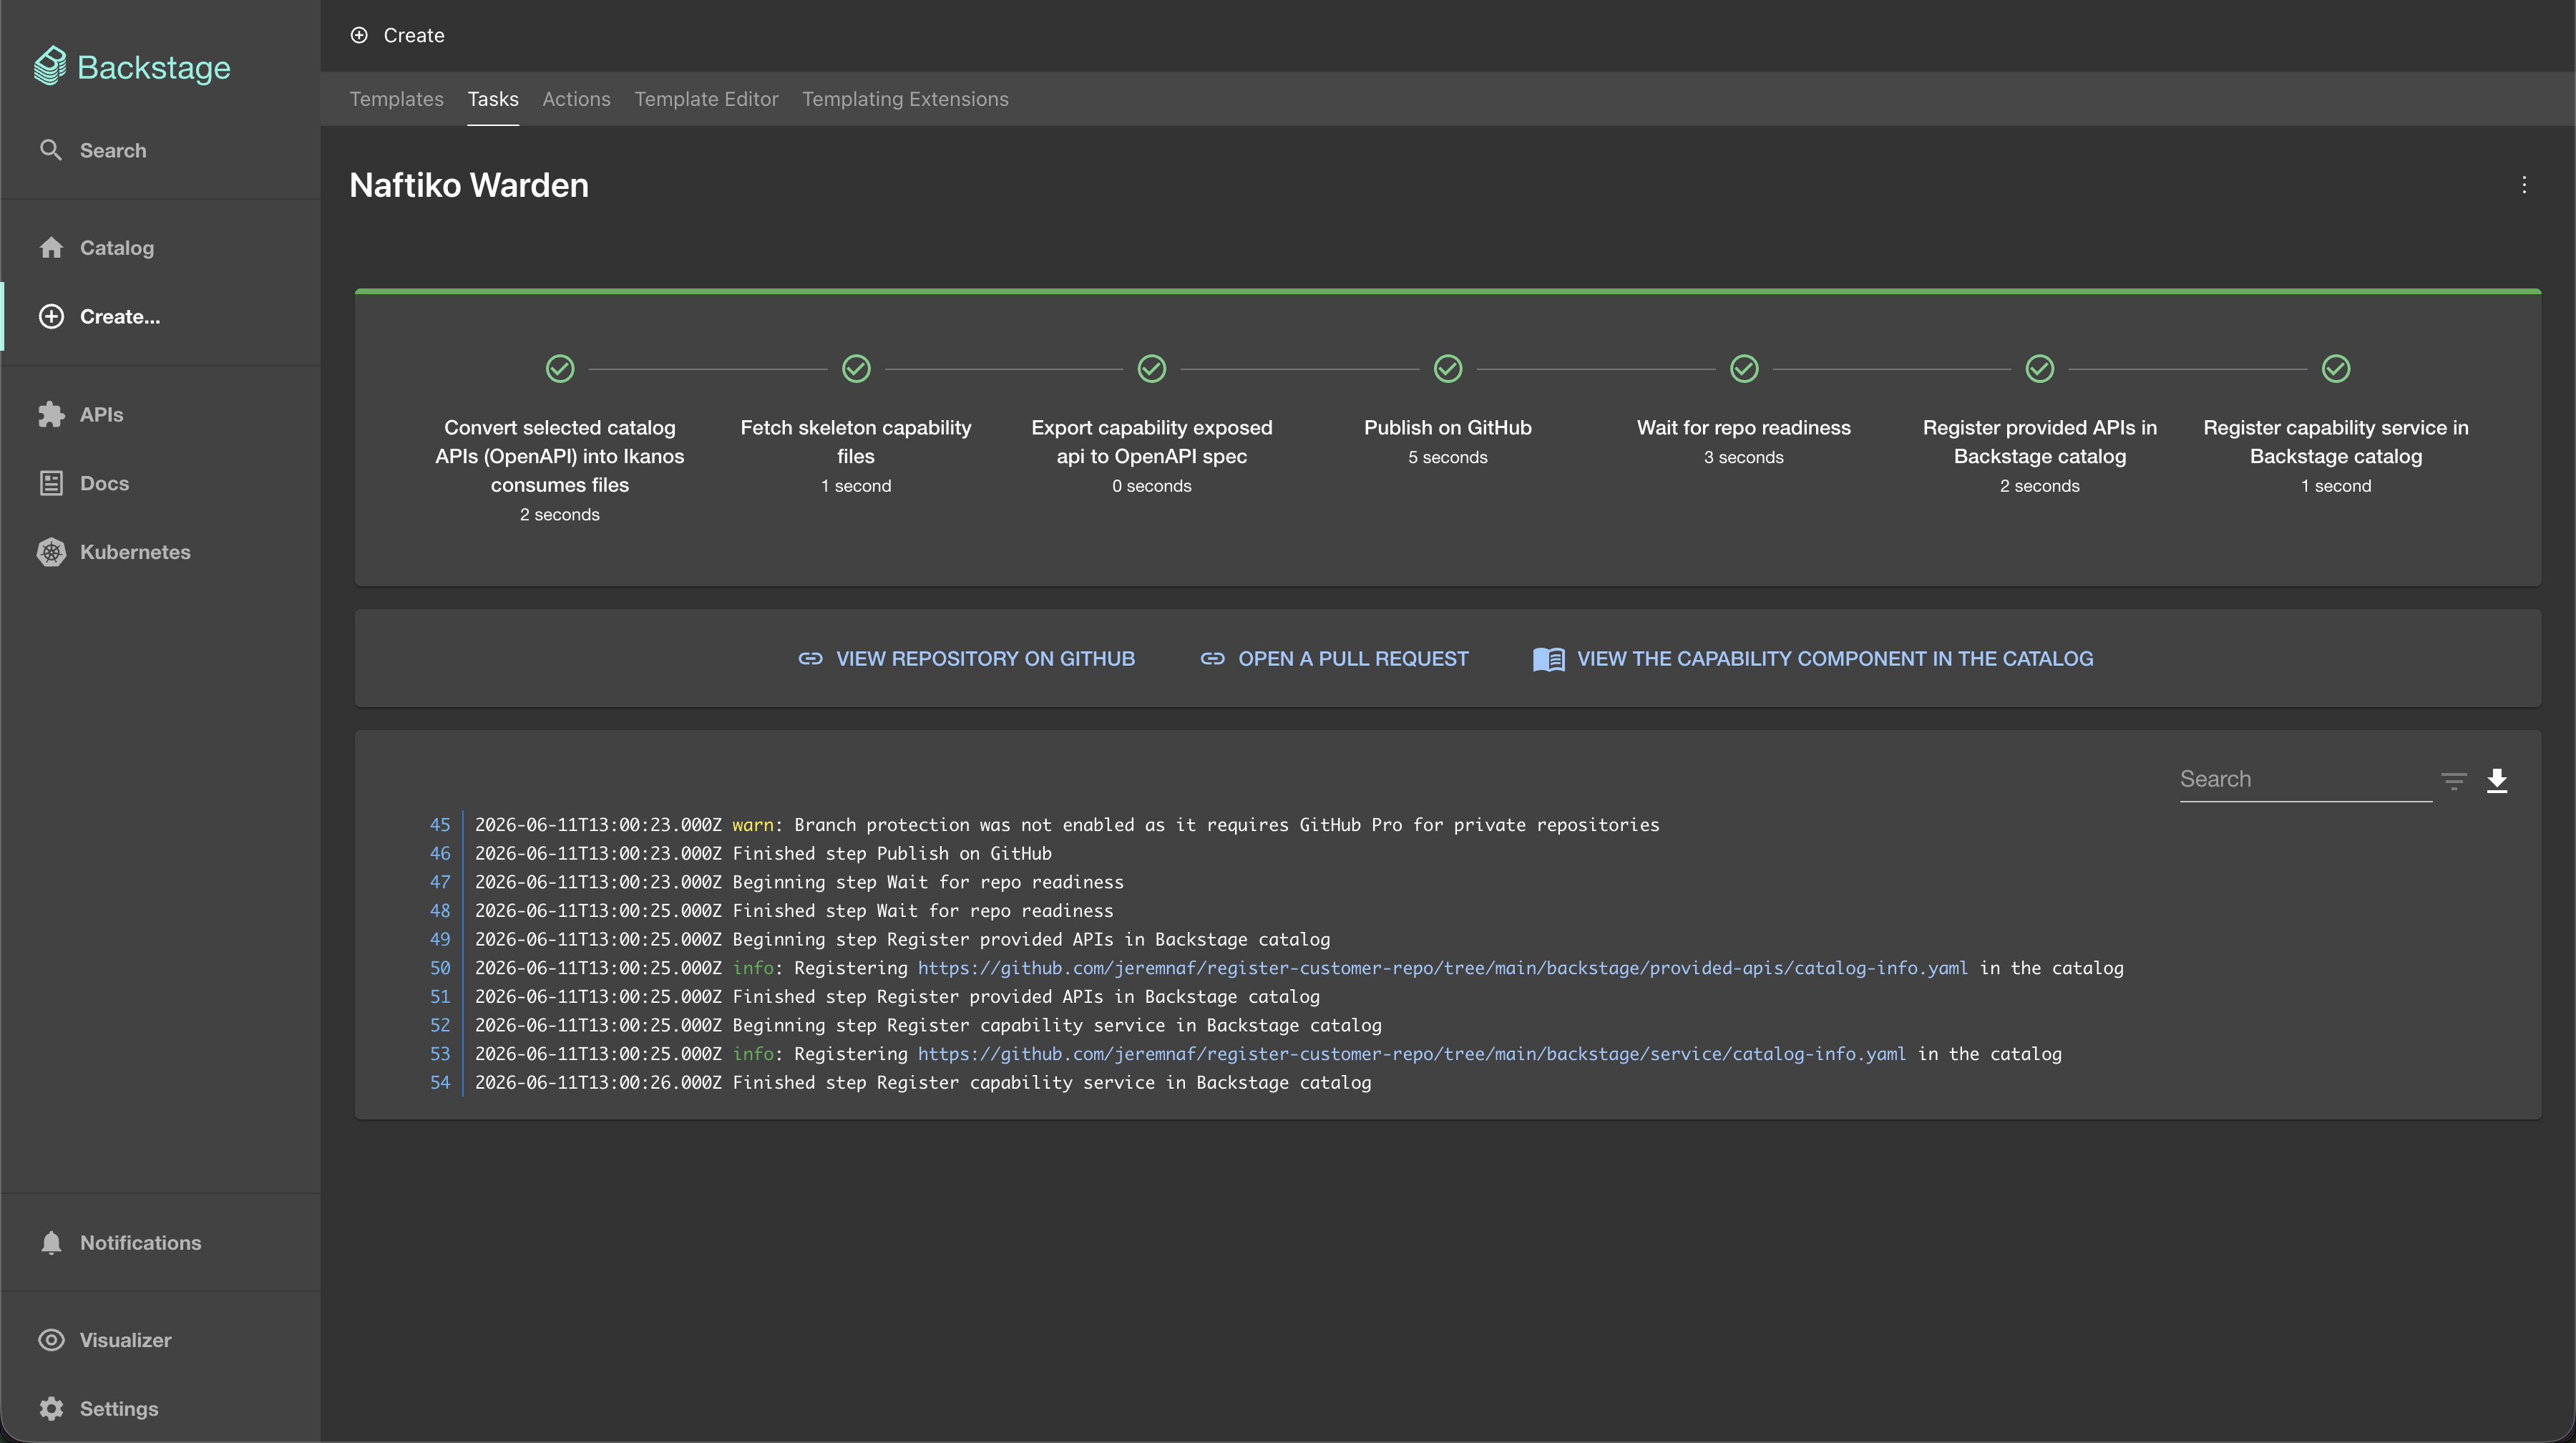
2. Scaffold the GitHub repository
Once you click on the 'Create' button, a screen displays the various actions performed by Backstage. For each step, if an error occurs, it will be displayed; otherwise, the step turns green.
The user clicks on Create
        │
        ▼
Backstage converts selected APIs into consumes configuration files.
        │
        ▼
Backstage pulls the skeletons files and completes them with the entered variables.
        │
        ▼
Backstage pushes the results files to a new GitHub repo
        │
        ▼
Backstage creates a new service component linked to this new repo and APIs, and adds it in its catalog
        │
        ▼
Backstage creates a new API component corresponding to the new service provided API, and adds it in its catalog
        │
        ▼
Summary informations are displayed (link to the new repo...).
3. Further editing the Naftiko Capability
-
You can now see a new service component in the Backstage catalog (for example
register-customerfrom the Home page). -
Click on it and you will access the details of the component. In addition to the wealth of information, you have access to the GitHub link of the repository. So you can pull it and start working from the canvas.